Redirect Toolkit
Redirect Toolkit is the ultimate DNN module for defining redirects against criteria such as current user information, roles, referrer, page parameters, host or browser information, date and time, server data. It also provides functions to track number of redirects, save referrer or arbitrary data and logging capabilities.
Getting Started
This page guides you through setting up Redirect Toolkit with a simple redirect that affects all users which are not registered. We will redirect all unregistered users to the Benefits page.
Step 1 - Installation
Note : If you don’t already it installed, proceed to Download Redirect Toolkit FREE TRIAL.
Using DotNetNuke Control Panel, instantiate a Redirect Toolkit module on the page where you want to redirect users from. Let’s assume the redirects module goes on the home page.
This is all we need to do for now, for more information read the Installation section.
Step 2 - Setting the Rule
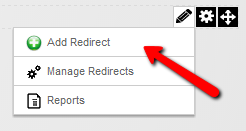
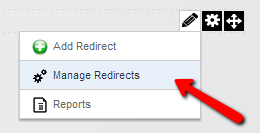
While logged in with edit rights for the Redirect Toolkit module, locate and click the Add Redirect link in Module Actions (preceded by the green plus icon). You will be redirected to the form for defining a new rule.
A rule is formed by 3 parts:
- General - provide friendly short description and specify priority
- Conditions - determines when the redirect should execute
- Redirect Action - determines what should happen when the conditions are met
- Additional Actions - provides other functions such as logging the redirects, saving referrer or arbitrary values and so on
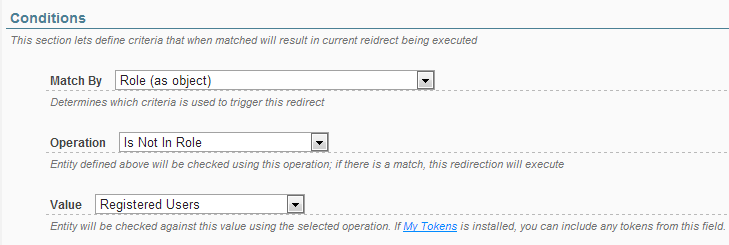
So the first thing is to set the conditions so it match ALL USERS THAT ARE NOT IN REGISTERED USERS ROLE. To do this, select the options as reflected in the image below. Note that the form controls will dynamically populate based on the options you select.
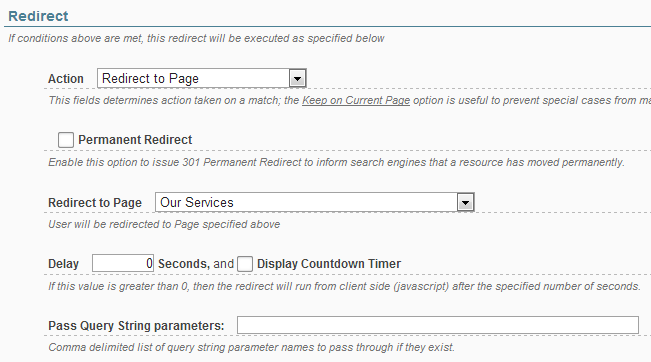
So far, we told Redirect Toolkit what to match. Next, we’ll tell it what to do when the condition matches. In our scenario, we want to redirect to the Our Services page. So in the Redirect section, set Action to Redirect to Page then select the page from the dropdown that activates below. The completed form should look like the image below.
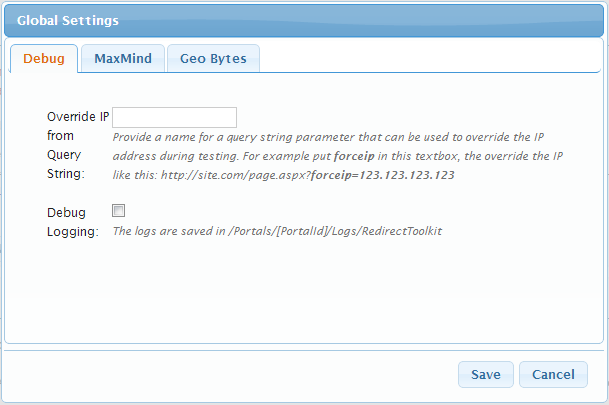
Note that once with Redirect Toolkit 2.2, we’ve added ability to override IP from query string. You can access this option from Global Settings - Debug.
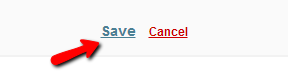
This is it! Make sure to SAVE the form at the bottom of the screen.
You will be redirected to the Manage Redirects screen that also can be accessed from the main page of the module.
Here you can see the new rule.
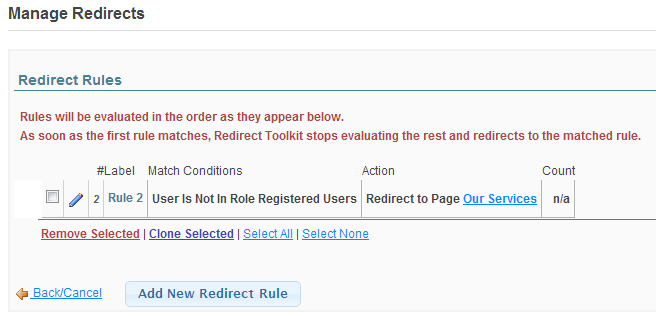
At this point it doesn’t make much sense since you only have one rule, but later on, as you add more rules, this screen is critical to manage the rules and determine the order in which they get executed.
Remember that rules execute starting at the top and that the execution ends when there is a rule that matches for current user (so the rest of the rules down the stack will not be checked). This will give you great power to design your redirects.
Step 3 - Testing
Important: Note that Administrators (or users with edit rights for the Redirect Toolkit module) will NEVER be affected by redirects. Though we’re going to test this rule as an unregistered user, this is good to know in the future as you define more redirects.
Testing this is very simple. Make sure you’re not logged in on your portal, then access the homepage (or whatever page you created the Redirect Toolkit module on). If everything is setup correctly, you should be redirect to the Our Services page (or whatever page you selected in the Action section). Log in and out to see the differences or change page permissions.
Don’t forget to reset the page permissions when done!
If the redirect doesn’t happen, please review all the instructions above or contact us for support on our forums.
Congratulations, you created your first rule! We recommend that you browse the rest of the documentation and experiment with various options.