Add Data
The new NavXp lighting speed main reason is the backend rendering with the help of Razor Script (0.003 sec). This means all our menu templates are Razor Script Files (.cshtml). To apply Custom Data to the templates means that you need to modify the templates as you want and use the data in the place you need it. (Ex: adding CSS Classes, CSS Styles or Custom Show Rules)
Now to do it?
In the next example we will go through all the steps to add a custom css class to our most basic template, the Simple Unordered List. Don’t worry if don’t know Razor Script this is simple.
Step 1
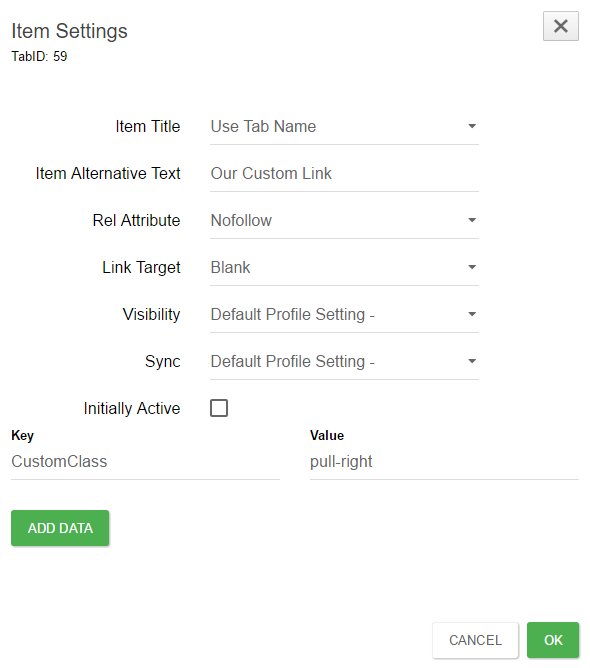
Set the custom data on the Profile Items you want. Let’s say we want a link to float on the right on the container.
Below we added the a key “CustomClass” with the Value of “pull-right” (Bootstrap class | float: right !important). Now if this value is applied in the class property of a element, in this case link we will achieve what we desire.
Step 2
Now we need to locate the template so we can modify it. You can find the template folder under: “\DesktopModules\DnnSharp\NavXp\Templates”.
In this case we need to make changes to “\DnnSharp\NavXp\Templates\UnorderedList\template.cshtml”.
The next line represents a link in our Menu (Try a text editor for a better view).
html += “<li id="menu-item-“ + item.TabId + “"><a class="” + ((item.IsActive) ? “active” : “”) + “" rel="” + item.LinkRelAttr + “" title="” + item.AlternativeText + “" href="” + item.URL + “" target="” + item.Target + “">” + (!string.IsNullOrEmpty(item.Icon) ? “<img class="nav-icon" src="” + item.Icon + “" aria-hidden="true"></img>” : “”) + item.Name + “</a></li>”;
Here we are creating a string that will represent out link on the website. We are adding a lot of properties like an unique id, the active class if need it, Alternative Text , the URL, etc. Well here we can, and we will add our custom data.
All the custom key-value data that we add in the admin page is stored per link (Item) under the data property (item.Data).
Best example is that our CustomClass value (pull-right) can be accessed here like this “item.Data[“CustomClass”]”.
Ok now, below is the CustomData already added. I recommend to take a look before continuing.
html += “<li id="menu-item-“ + item.TabId + “"><a class="” + ((item.IsActive) ? “active “ : “”)_ + (item.Data.ContainsKey(“CustomClass”) ? item.Data[“CustomClass”] : string.Empty) +_ “" rel="” + item.LinkRelAttr + “" title="” + item.AlternativeText + “" href="” + item.URL + “" target="” + item.Target + “">” + (!string.IsNullOrEmpty(item.Icon) ? “<img class="nav-icon" src="” + item.Icon + “" aria-hidden="true"></img>” : “”) + item.Name + “</a></li>”;
We added “+ (item.Data.ContainsKey(“CustomClass”) ? item.Data[“CustomClass”] : string.Empty) +”. This will do the trick.
What we added is basically a simple if else clause . The creation of the html goes through all the elemnts but we don’t have this key only for Our Custom Link so we need to be sure that if we want to display it that the data is there (else we get an ugly exception) so we search if our key exists and if there we show the value else just an empty string.
Step 3
We are done.
In the picture below Home Profile Item floats now on th right of the screen

You can download this exemple here -> template.cshtml.
Let me add that the exemple supports the Key CustomClass for each Profile Item.