Localization
People all over the world treat the Internet as their main location for information and services. These people do not speak the same language so localization has become one of the primary tools for business global expansion. Doing this well will boost the company’s ability to connect with those visiting the site, not to mention, foster a healthy relationship with potential customers.
Enabling Content Localization in DNN 8.0.4
Action Form can be easily translated. Before starting to add languages, you need to apply one setting: allow the site administrators to enable content localization for their site. Note that this is the standard procedure in DNN 8.0.4. You can do this by following the steps bellow:
- Go to Host -> Host Settings -> Other Settings and put a check mark next to Allow Content Localization.

Now let’s add some languages to your site and translate the Action Form module.
1) Go to Admin -> Advanced Settings -> Languages.

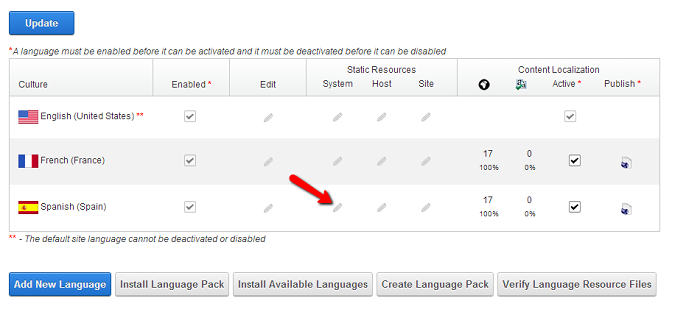
2) In this section you have the ability to add new languages and edit them. Before that, click on the Enable Content Localization button. As an example we are going to install the Spanish language. Click on the Add New Language button.

3) Select the language from the drop-down list and then click on the Update button.

Editing Localization
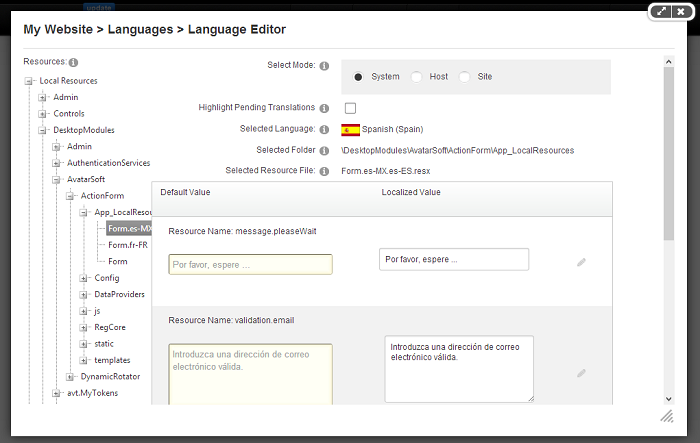
1) Now we have installed the Spanish language. Put a check mark on the Content Localization - Active column to activate the language. Next click on the Edit button for the System column. A pop-up window will open with the Language Editor section.

2) Select from the left menu Local Resources -> Desktop Modules -> DnnSharp -> ActionForm -> App_LocalResources -> Form. In this section we can edit the Spanish language of the Action Form module.

3) After you finish with the translation, click on Save Resource File button to save the changes. Now your form is translated.

What can be Localized?
You can localize all the front-end like validation messages, custom validations, the bootstrap template, also the standard templates (Contact Form, Login Form, Registration Form, Subscribe to Mailchimp). Note that for custom validators, the name must be like this: validation.“the-validator-name”. ex.: validation.url. You can localize the standard form templates (Contact Form, Login Form, Registration Form, Subscribe to Mailchimp) just by copy/paste and renaming the .config file.
Ex.: In this example we will create and translate the Spanish language. Follow this path: LocalResources\DesktopModules\DnnSharp\ActionForm\Config\Templates\ and copy/paste the Contact Form.config file; rename it into Contact Form es_ES.config. Translate the Contact Form es_ES.config file. Now when you will create a standard Contact Form, you’ll have the possibility to chose the language in which the form is created.